This one was a comission for my dear old friend Mike. He and I go way back. We ruled marching band with iron fists, and he always had my back. Except when he was busy with other musical ensembles. Or sports. Or AP classes. Or some yucky girl. Damn overachievers.
Amongst other things, he's now the percussion instructor at *censored to protect the children!* High, home of the Seakings! So I got asked by his better half to craft a mighty Trident-of-stay-out-of-the-band-section for my old band comrade. Who could resist?
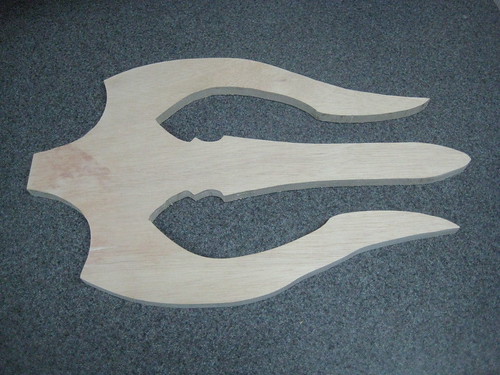
A general design was loosely sketched, scanned and turned into a nice, precise, symetrical, curvy vector drawing, which was printed out for blueprint/ template duty. I wanted something dramatic and sweeping, but hopefully didn't venture too far into the dreaded fantasy cutlery category with my shape...
I had the batshit notion of making this thing out of plywood (WHY?!?) Allegedly for strength. Pha. I glued one copy of the prints to some .5" harwood ply if I remember right, and set to cutting it out on the band saw. The outside contours were refined, and then taken to my ghetto router table to create some of the bevels. The more gradual ones were shaped by hand with a surform. The one useful aspect of the ply was the fact that it's layers allowed me to gauge the contours and keep the form pretty symetrical. I painted the whole thing down with wood glue to help seal it up and keep the layers together, and then moved on to the joyful process of bondo, sand, repeat. Periodically interspersing a light primer coat so that I could gauge my progress.
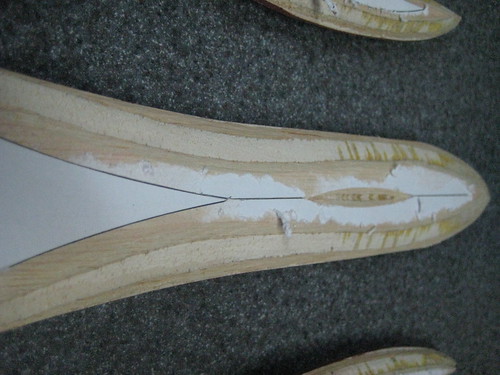
A groove was cut into the center of the trident blade to accept a threaded rod. I don't remember whether I dedo'ed that, or just dremelled it. In any case, the rod was placed in, and secured with lavish quantities of epoxy. The rod travels quite far up the blade in an attempt to enhance structural integrity. After this, more bondo to cover the groove. Once I had the whole thing smooth, I plastered it with more bondo! What?! I wanted to create a rough texture, 1) b/c it would be interesting, 2) in an attempt at evoking a rough-cast finish. I figure that this thing is so monstrously thick and nasty that it may be realistic to cast it, then peen out the edges, like a scythe, rather than forging the thing.
The shaft was the handle for a hoe from the hardware store. (Wow, that whole sentence could be taken as a euphemism...) It came complete with plenty of scratches and machine marks, and an ugly epoxy coating, and so of course I took some sand paper to it. Once the old finish was gone, it received about 4 coats of black polyurethane, giving it a lustrous, laquer-like finish. It looks really purdy. I purposely dragged the brush thru coat 2 or 3 once it had started to get a little tacky to create some texture similar to that on the blade. The subsequent, properly applied coats of polyurethane knocked the texture back to a very subtle, but still visible level, and left it with a nice, smooth finish.
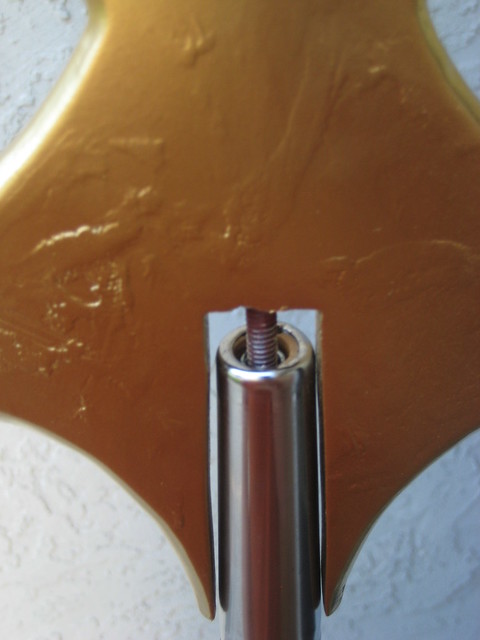
The Handle came with a hole in the end to accept a gardening implement's tang, which was far wider than the threaded rod I embedded in the trident head. I bored the bottom of the hole deeper with a bit that would just accept the rod, and then fitted a threaded insert nut to the top of the hole with some epoxy for extra insurance.
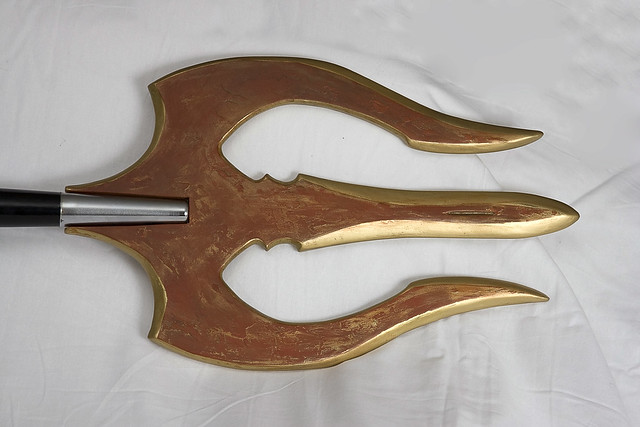
The trident head next got a good, thick coat of satin black, and then one of chrome gold. I masked off the edges of the blades, and then gave it a light coat of a matte paprika red. (A favorite flavor and color of mine!) And on top of this, a very light dusing of gold to give the red a little iridescence.
Unfortunately for me, this gold layer turned out to be heavier than I thought it was out in the glaring sun, so I briskly wiped the raised surfaces with an acetone rag to pull most of it back off. This was quite harrowing, but I managed to keep from removing any paint I didn't want to remove. The edges of the red were also weathered with acetone. Acrylic paint in green, brown, and black were applied to the recesses and crevices to add a little more wear, and to suggest patination. Next up was a satin clear coat to protect the piece.
Finally, the trident head could be threaded on to shaft (which took a long damn time; it's a long threaded rod!) The cutout in the bottom of the blade fit the shaft's ferrule quite nicely, bracing firmly and making for a very secure piece. No real need to glue or locktight it in.


No comments:
Post a Comment